
Last year, Gremlin’s LG G4 suffered a rather inexplicable problem: the battery swelled. Instead of pushing off the [impressively tight-fitting] back cover, it fractured the screen.
Being a very new phone [not quite six months old, I think], I figured LG would take care of it.
I was wrong.
LG took it for a month, declined to fix it, declared the warranty void due to physical damage, and closed the issue entirely.
LG’s twitter never responded to me after asking me to direct message them about it.
So, I decided to fix it myself.
I purchased a full screen unit [not just the touch/LCD unit, but the full frame, except for small parts] online, and…then finally got around to it the other day.
I used the little precision toolkit my parents got me for Christmas.
I forgot to photograph the first few steps. I’m just not very good at this.
Step 1, obviously: Remove back cover and battery.
Step 2: Remove the teeny little screws [I used the #00 Phillips, as it seemed to fit best].
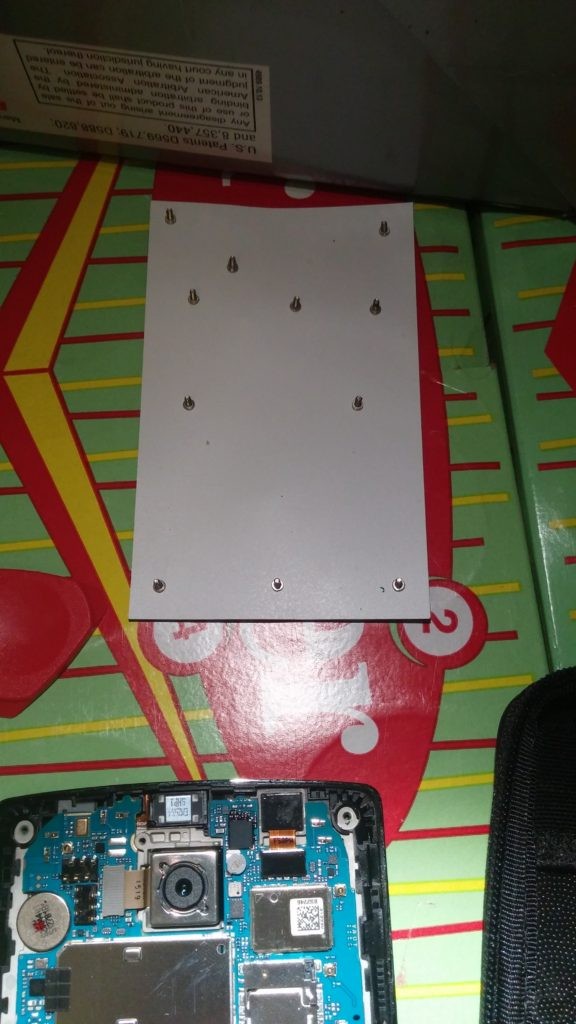
I also placed them on my nifty little magnetic pad that came with my kit. I tried to keep them roughly in the same position they were in when actually in the phone. They seem to all be the same size, though, so it may not matter quite that much.
Step 3: Carefully pry off the black plastic you just unscrewed. You can apparently do this with a guitar pick–I used the tools my kit came with. One of them is actually shaped like a guitar pick.
I much prefer the long, thin, very flexible metal tool, though. It works very well, doesn’t end up quite as damaged as some plastic spudgers, and doesn’t seem all that likely to inflict damage, either.
The black plastic thing comes off in one piece, which is convenient.
The buttons can be removed, but I did not need to do that, so they can stay in there.
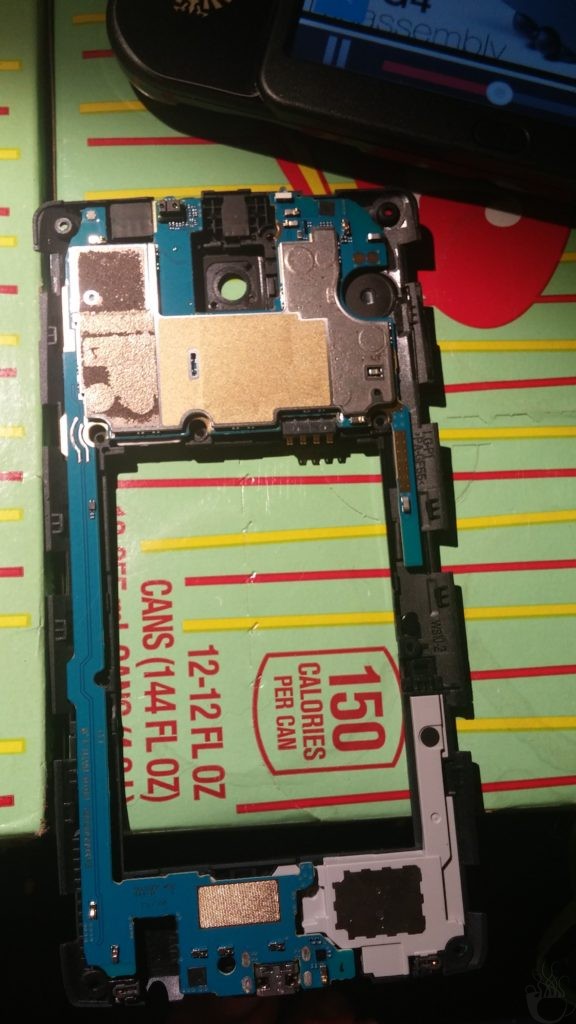
Here’s what’s under that black plastic thing:
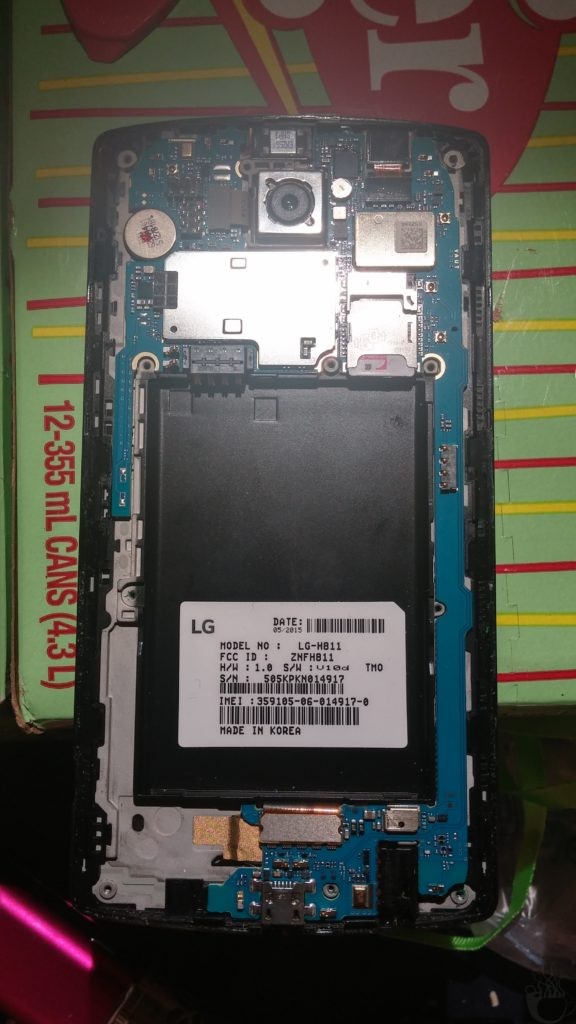
Pretty neat, isn’t it? That green thing with the shiny bits? That’s your phone, right there. That’s what makes it run, and remembers everything.
That tiny green board is a computer. For a lot of you, that tiny green board is a computer more powerful than the first computer you ever used.
But that’s not what we’re here for, so let’s get it out of the way. Carefully, though, because if this breaks, we’re fucked.
Step 4: Carefully pry up those ribbon cable connectors.
There are three of them. Two at the top, one on the bottom.
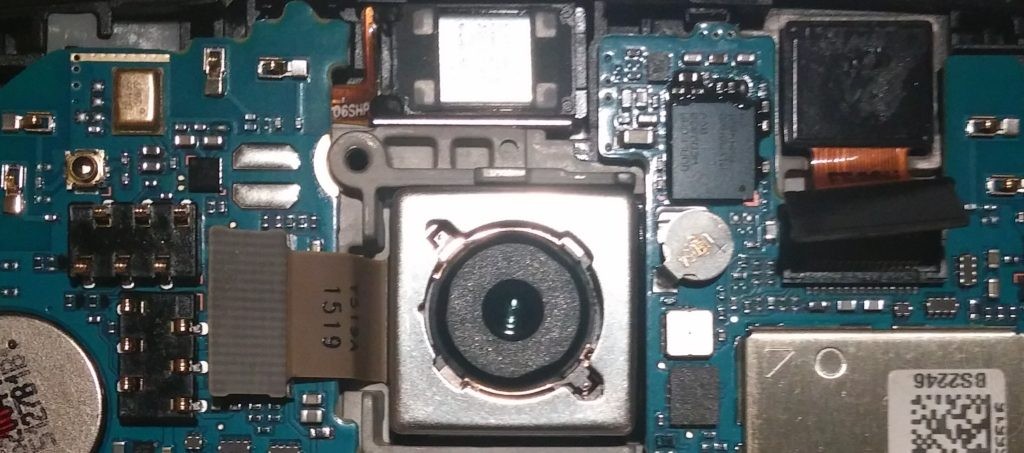
The two at the top are for the cameras. The obvious one here is the rear camera. The ribbon connects to the board to the left of the camera.
The less obvious one is in the upper right. That’s the front-facing camera. The selfie-camera, or whatever. That connects directly underneath the camera itself.
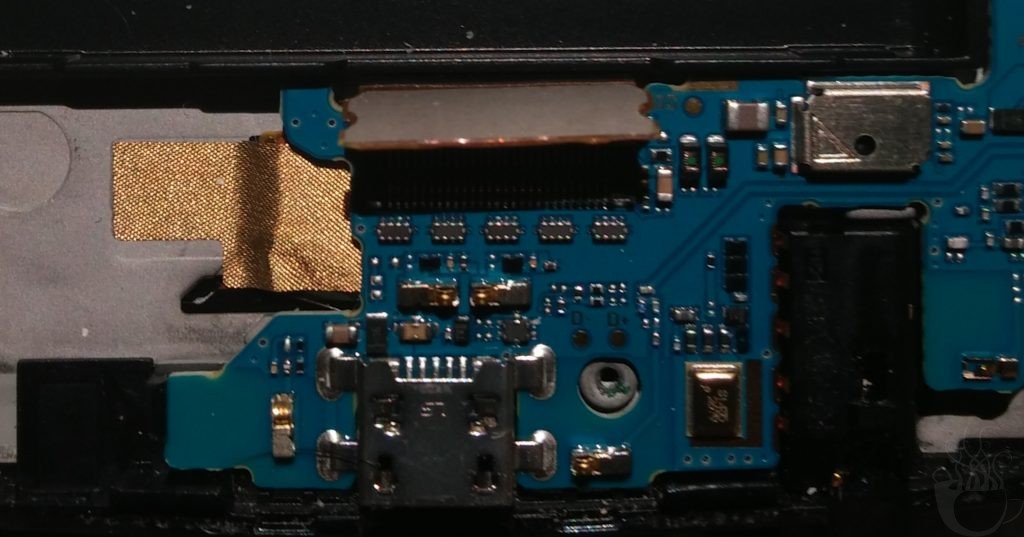
The third, pictured here, is at the bottom of the board.
This is how the screen connects. It’s like…a really, really tiny monitor cable.
Also in this picture, just to the right of the cable, is where the headphones plug in.
We’ll be removing that in a minute, along with the two cameras in the previous picture. First, though, we need to get the board out of the way.
Step 5: Remove the board.
It just lifts right out, although you should really be careful about those delicate little cables. And, as you can see, the black plastic bit makes a very convenient tray if you flip it over.
I guess now would be a good time to address this: yes, my work surface is a couple of Heritage Dr. Pepper boxes. And yes, I’m using a 3DS to watch YouTube videos that walk me through this process.
We’re almost done. Just the screen assembly, and the various small bits that are stuck to the screen. Literally stuck. There’s this sort of adhesive involved.
Step Six: Remove All These Things….
There’s a lot of prying involved. The headphone jack comes off fairly easily. The front-facing camera, too. The rear-facing camera, on the other hand, takes some effort, and you have to be careful about it, because it isn’t just a big metal box–there’s a little board attached to it, opposite the connecting ribbon.
That strange coin-battery looking thing? Sorta upper left?
That’s what makes your phone vibrate, apparently.
That little thing shakes your entire phone.
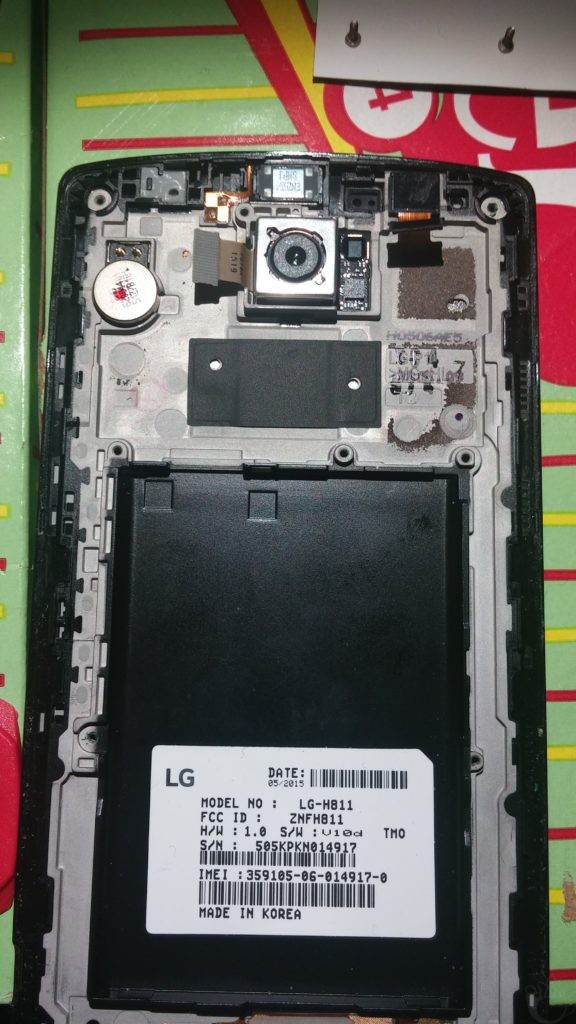
Lastly, there’s the earpiece. Way up top. Be very careful with this, because it’s got a fiddly little ribbon that’s pretty much glued to the phone. You don’t want to tear that.
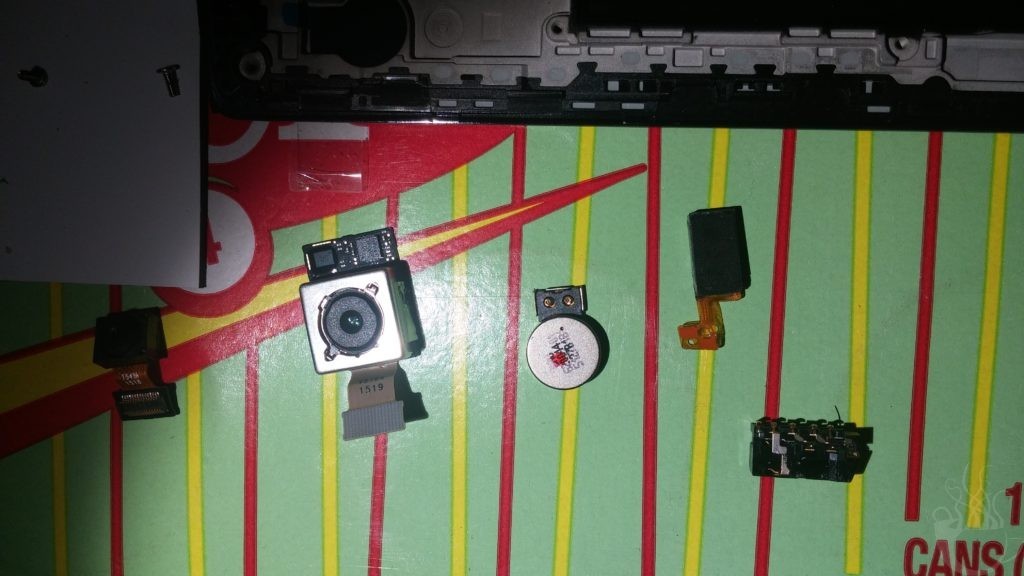
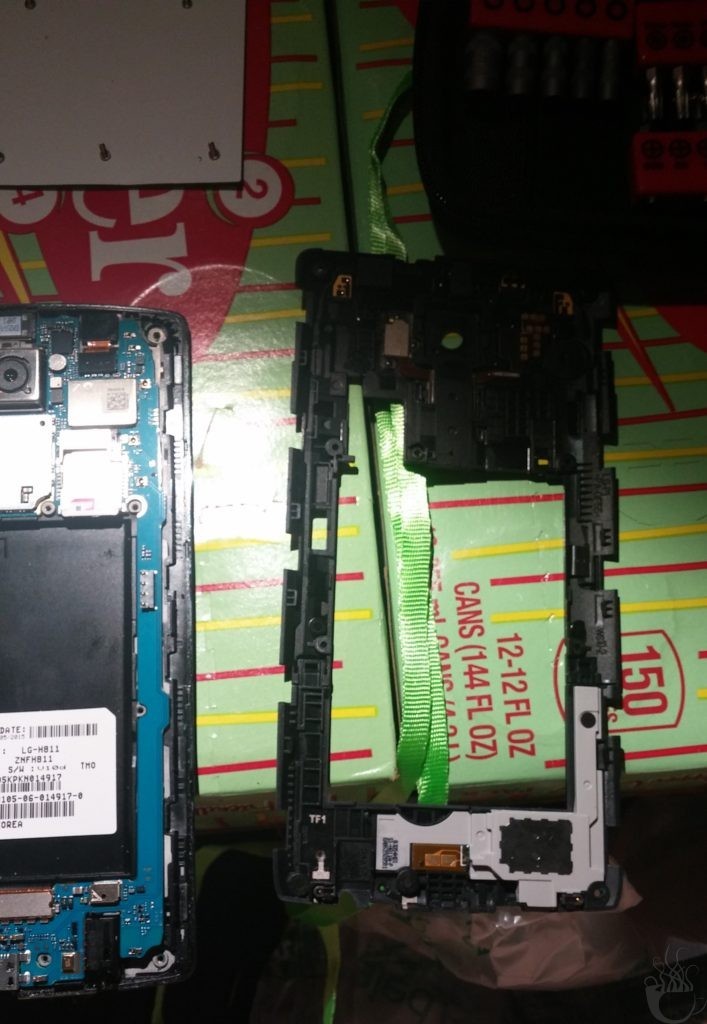
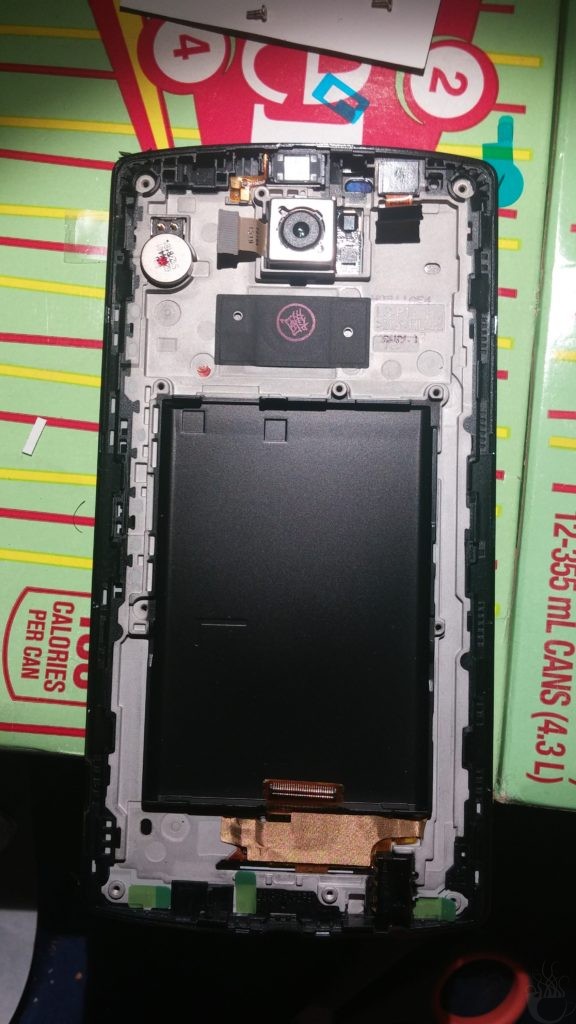
There they are, all removed.
And here’s where I messed up, because I only did what the videos said to do. Which, y’know, is reasonable. But they forgot two parts that aren’t included in the screen assembly. They just…overlook them.
Don’t overlook them. If you do, your freshly unbroken screen will do weird shit, like ‘instantly turn off when you try to make a call’.
Step Seven: DO NOT OVERLOOK THESE PARTS
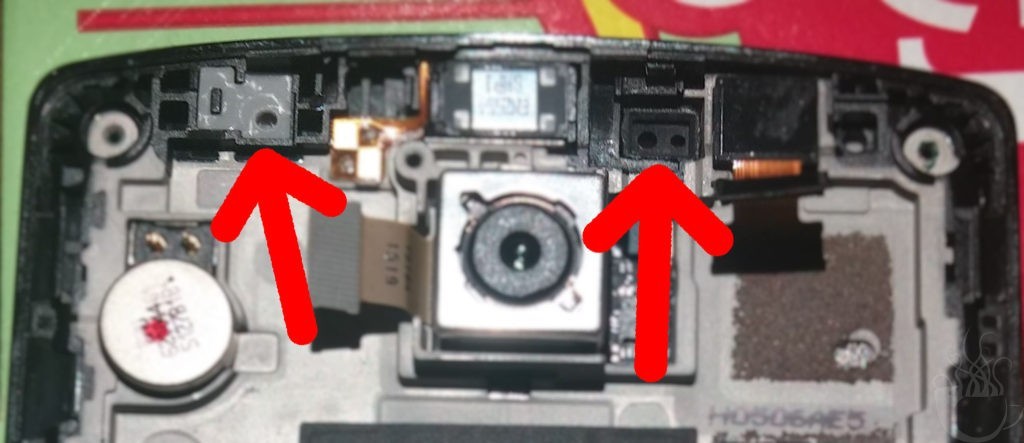
THESE. RIGHT THERE.
They’re stupid little rubber bits, but they are apparently just…vitally important to the operation of the phone. You just…carefully tweeze them out, and then put them into the screen framework you bought to replace your broken one.
Step Eight: Now we go in reverse.
Once you’ve got those rubber bits in [oh, and you may want to peel off that gold shielding sticker from your old screen assembly and place it where it goes on the new one, if yours didn’t come with one], start putting the parts where they go. Some of the places will have pre-stickied spots you can peel off, but you can also get a roll of ridiculously thin double-sided tape meant for phone repair.
I left the front-facing camera until after I placed the board, because it kinda didn’t need to go in before the board, and it made placing the board easier. Everything else, though? Probably should go in first.
Then, reconnect the cables, press the black outer shell back on [it should click into place easily], put the screws back in, insert the battery, and power up to test….
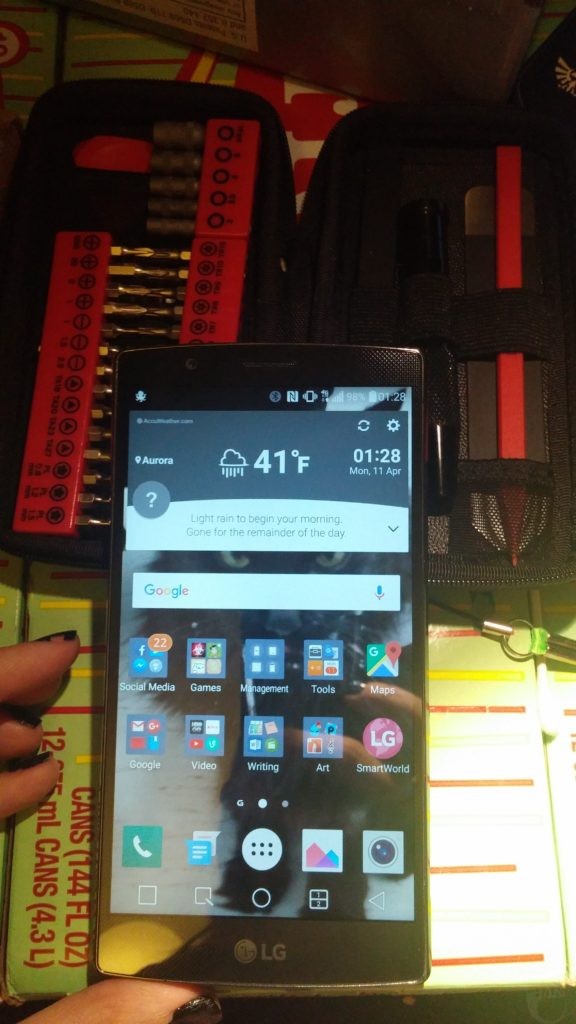
Success!
LG tried to screw me? Well, fuck you. I am competent enough to fix a computer–even a tiny one that [barely] fits in a pocket.